Brief introduction to process parameters of injection molding
Five elements of control in injection molding:
Temperature: including drying temperature, barrel temperature, mold temperature and machine oil temperature
Pressure: including clamping pressure, opening pressure, injection pressure, holding pressure, seat in and seat out pressure, jacking in and jacking out pressure, cable inversion pressure and back pressure
Speed: including mold locking speed, mold opening speed, injection speed, pressure maintaining speed, seat in and seat out speed, jacking in and jacking out speed, and rewinding speed
Time: injection time, holding time, baking time, molding cycle
Position: injection related position, mold opening related position, mold closing related position, and rewind position
1. Temperature
(1) Oil temperature: for the hydraulic press, it is the heat energy generated by the friction of the hydraulic oil during the continuous operation of the machine. It is controlled by the cooling water. When starting up, make sure that the oil temperature is about 45 ℃. If the oil temperature is too high or too low, it will affect the pressure transmission.
(2) The barrel temperature refers to the heating temperature on the surface of the barrel. The role of the barrel temperature is to convert the solid granular plastic raw materials into a semi liquid state with good fluidity. The machine operation can fully fuse the auxiliary materials such as pink and mother of color together, so as to meet the needs of filling into the mold. The barrel is heated in three sections, from the hopper to the nozzle, from low to high, to gradually melt and plasticize the plastic.
The first section is the solid conveying section near the hopper. The temperature should be lower, and the hopper should also be cooled with cooling water. The second section is the compression section. The material is in the compression state and gradually melts. The third section is the metering section, where the materials are in a fully molten state. After the pre molding is terminated, a metering chamber is formed to store the plasticized materials to ensure that they are in a molten state.
(3) The nozzle can accelerate the melt flow, adjust the melt temperature and homogenize the material. The nozzle temperature is generally lower than the maximum temperature of the barrel. On the one hand, it is to prevent overflow. On the other hand, it is the decomposition of plastic that affects the quality of products.
Note: The barrel temperature and nozzle temperature are related to other process parameters. If the injection pressure is low, in order to ensure the flow of materials, the temperature of the barrel and nozzle should be increased appropriately, otherwise, the temperature of the barrel and nozzle should be reduced. Generally, the process parameters can be adjusted through “air injection method” and “visual analysis method” of products to determine the best barrel and nozzle temperature.
(4) Mold temperature
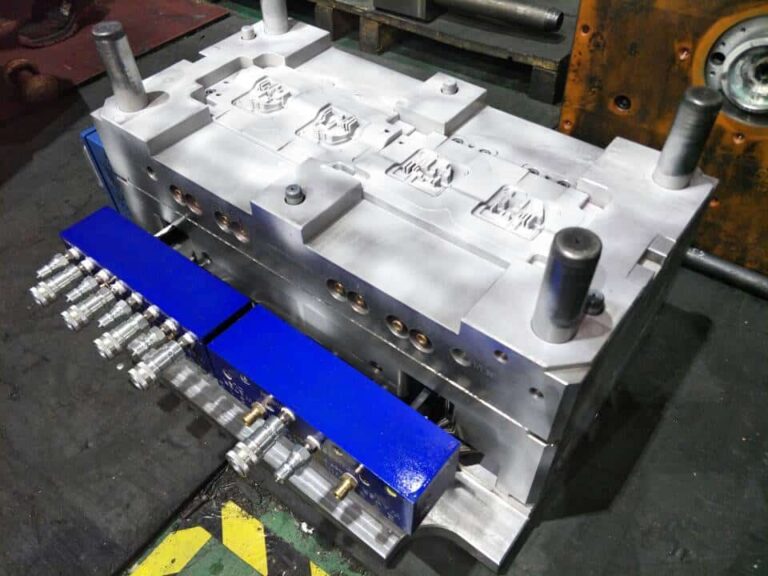
Mold temperature refers to the surface temperature of mold cavity in contact with products, gates and runners. It has a great influence on the appearance of the product, the air lines, the wire clamping, the size and the internal performance. Increasing the mold temperature can improve the fluidity of the melt, increase the shrinkage of the product, release and reduce the internal stress of the product. The mold temperature is usually controlled by adjusting the temperature of the mold temperature machine. The mold temperature machine is an auxiliary equipment. It is not a part of the injection molding machine. It has an independent temperature rise and fall system and a device to circulate the media.
(5) Hot runner temperature
It is divided into insulation type and heating type. The hot runner system is characterized by keeping the melt with the theme of the main runner and the branch runner from solidifying in each injection molding cycle, so as not to produce material handle and cold glue. It can also reduce the consumption of plastic raw materials and energy consumption in molding, and shorten the molding cycle. Its temperature setting depends on the processing temperature of the materials used. Generally, the temperature is higher than that of the nozzle, and the molten state is kept without salivation.
2. Speed
A. The speed setting of mold opening and closing is generally based on the principle of slow fast slow. This setting mainly considers the machine, mold and cycle.
B. Ejection setting: it can be set according to the product structure. For complex structures, it is better to eject some slowly and then demould quickly to shorten the cycle.
C. Shooting speed: it is set according to the size and structure of the product. If the structure is complex and the wall is thin, it can be fast. If the structure is simple and the wall is thick, it can be slow. It should also be set from slow to fast according to the performance of the material.
3. Pressure
(1) Ejection pressure
The injection of solution enters the mold cavity through the injection pressure flowing from the nozzle to the main gate of the mold through the splitter gate. The injection pressure of the screw head must maintain a certain pressure to fill the mold cavity after overcoming the resistance loss encountered by the solution after entering the mold cavity.
(2) Pressure holding pressure
When the high temperature solution fills the mold cavity, it enters the pressure maintaining and feeding stage until the gate is frozen. To compensate for the volume shrinkage of the solution caused by the temperature drop. Therefore, the setting of the holding pressure will have an important impact on the shaping process of the solution and the product quality.
(3) Sol back pressure
The sol back pressure is an auxiliary pressure to control the density of the solution in the feed pipe. Adjusting the back pressure can effectively discharge the gas of raw materials in the metering section of the material pipe, enable the color of raw materials with color to mix evenly, and also directly affect the shrinkage and size accuracy of products.
(4) Clamping pressure
Clamping force refers to the maximum clamping force that the clamping mechanism of the injection molding machine can exert on the mold, also called clamping force. When the injection molding machine is injecting, the molten material enters the mold cavity after passing through the material pipe, nozzle and gate. Part of the injection pressure is lost in the nozzle and gate, and the rest is the melt pressure in the mold cavity, usually called the mold cavity pressure. The clamping pressure must be set to be greater than the mold cavity pressure when filling the mold to prevent the mold from being stretched out to produce flaring. Excessive clamping will reduce the precision and life of the die.
4. Time
(1) Glue injection time
It refers to the time when the screw moves forward and the molten material fills the mold cavity. According to the size and thickness of the product and the appearance of the product directly observed, determine the length of the set glue injection time. The injection time setting device of the injection molding machine can only set one time, regardless of whether it is multi segment or single segment injection.
(2) Pressure holding time
After mold filling, continue to promote the melt feeding, maintain the feeding flow stage until the gate is frozen, so as to obtain dense products. The holding time of the injection molding machine must be set for each segment.
(3) Cooling time
It refers to the cooling stage from the solidification of the gate to the demoulding, which can make the products just formed in the mold have a certain rigidity and strength to prevent ejection deformation during demoulding. At this time, the melt can no longer enter the mold cavity, and the weight of the products can no longer be changed. The cooling time and glue (material storage) are mostly carried out synchronously, which is generally longer than the glue melting time.
5. Location
(1) Mold opening and closing position
It can be set according to the speed of mold opening and closing. The key is to set the starting position of the low voltage protection, that is, the starting position of the low voltage should be the point that is most likely to protect the mold without affecting the cycle, and the ending position should be the position where the front and rear molds of the mold contact during slow mold closing.
(2) Ejection position
This position can meet the requirements of complete demoulding of the product. First, set it incrementally from small to large. Note that the backward position must be set to “0” when installing the mold, otherwise the mold will be easily damaged.
(3) Melt glue position
Calculate the material quantity according to the product size and screw size, and then set the corresponding position.
(4) The V-P position shall be found by the short short method (short shot method) from large to small (i.e. V-P switching point).

